Wednesday, November 27, 2013

Chicken-Sitting, Preparation, Part 1

Due to a great misfortune (house fire) that has happened to our neighbor and faithful egg supplier, we will soon be chicken-sitting (while this neighbor re-groups with her many critters and crisis home situation). We look forward to helping a neighbor and also to trying our hands at "livestock".

After some pondering and research we decided to convert our potting shed back into a chicken coop, use part of our existing fenced-in garden for a chicken run and, since these two structures are about 50 feet apart, connect the two with what we are calling a chicken tunnel.

Below Steve is at work fencing off a corner of the garden for the chicken run (so they can have access to fresh air and sunshine):


Here you can see Jennifer at work using some wire fencing to build the chicken tunnel frame, which will connect the run with the coop (you can see a bit of yellow in the background - the coop):


Here you can see the corner of the run and the wire tunnel that leads to the coop:


Of course, the chickens need nesting boxes inside the coop so...into the woodshop:


Nesting box installation inside the coop: 


The chickens also need a place to perch. Below Jennifer installs some sticks (that will serves as perches) that she salvaged from one of our wildlife brush piles:


The chickens arrive on Sunday but we are getting close to ready...wish us luck!

Oh, and Happy Thanksgiving everyone!  Here's a song that made us smile.

Sunday, November 24, 2013

Southern Exposure: New Patio Door!

In our never ending quest to improve the energy efficiency of our century-plus old house we try to focus on things that increase the transmission of sunlight (and warmth) through our south-facing walls.

Here is our latest adventure in solar gain: patio door!

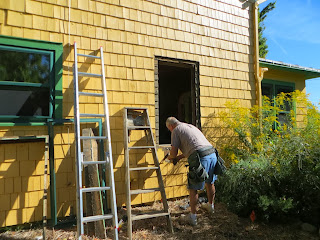
We hired some help for the rough install:


We then took over with the weather-proofing, entry steps and trim:


Jennifer stained/varnished the entry steps with a mix of supplies left from the prior owners:


Steve used reclaimed boards to create new trim that matches the old trim:


We finished this just in time for winter and bird-feeding season but we are already looking forward to...


...all the time we will be spending next summer having meals, coffee/treats and the like just outside to the south on the edge of our first small prairie planting (seen hear in dormancy but it will be alive with color and life before we know it. Actually, even today, it's still full of life - birds gleaning seeds, beneficial insects over-wintering and many more lives being lived than we even know about). 


We like to think that our indoor-only cats get a bit of enjoyment basking in this new sunny spot and observing our feeder birds. Flora can be seen here looking out the left door panel:


Sunday, November 17, 2013

Sturdy Low Tunnels for Raised Beds, Part 2

You will recall from "Sturdy Low Tunnels for Raised Beds, Part 1" that we've been growing a lot of greens post-frost. We have also been eating a lot too...the endgame! Here's an example of a simple recipe:

Easy Greens:

  • Lots of greens, chopped coarsely
  • Olive Oil, to saute
  • Garlic (2 cloves, chopped finely)
  • Chilies in adobe sauce (3 chilies, chopped finely)
  • 1 T Sesame seeds, toasted. 
  • 1 tsp. Poppy seeds, toasted.
Here's what we did, give or take:

Check each leaf for cabbage-white butterfly caterpillars:


De-rib the leaves, compost the ribs and stems, chop coarsely in a bowl using kitchen scissors:


Saute garlic and chilies in olive oil:


Add the greens, mix with the above and saute until desired (we saute at 5-8 minutes):


Near the end of sauteing, add the sesame seeds and poppy seeds:


Serve with bread of choice and garnish with cilantro (since we have a ton anyway!):


Gotta love gardening and greens!


Sunday, November 10, 2013

Sturdy Low Tunnels for Raised Beds, Part 1

For years now we have been excited to integrate season-extension concepts such as row covers into our gardening. That time has finally come!

We are going to call the below a low tunnel (rather than a row cover) because it's quite sturdy and more versatile than a row cover.

Here's what we did:

Made a frame to match the dimensions of the raised bed using 2x2s fastened together with long deck screws and strengthened with...


...corner gussets made of 1/2 inch thick plywood:


For the tunnel frame we used some salvaged fencing:


We attached the fencing with u-shaped fence staples and a lot of strategic wire bending and twisting:


Ends were cut from scrap fencing to fit, secured to the frame with fence staples and secured to the top by twisting loose wire ends:


 Here is the finished low tunnel frame:


Here's the frame atop one or our raised beds. This bed is chock-full of kale, cabbage and early purple sprouting broccoli:


Here you can see Jennifer fastening the low tunnel frame to the raised bed with a hinge so that we can access the green "goods":


Here we attach the fabric covering and then...


 ...the plastic covering. We can remove the plastic next spring when temps rise but leave the fabric covering on for insect and light frost protection:


The end-game: easily-accessed bountiful greens well into the cold season and, we anticipate, year round!


We love our greens!


Monday, November 4, 2013

Basement Stairwell Project

In the midst of our library (dining) room sliding door project, we squeezed in a quick basement stairwell makeover.  We replaced the back door so light can stream in and replaced the stair treads that had been covered with linoleum and eww! with cat pee from an unhappy cat.  Thankfully, the kitty cat is now very happy and the basement stairwell is much improved.

The drawn out fall weather is helping us tremendously.

 
New treads at top, old on bottom.


The landing had linoleum too, but it pulled off fairly well.  We sanded off some of the glue (pain in the a**!) and then decided - it's the basement stairwell, who cares if a bit of glue is left!  From my shirt you can see I got in a little too close to one of the tick trefoils in the area. A week later and we are still finding these seeds all over the house and stuck to the cats!  What a great seed dispersal mechanism...stick tights.


We're getting there now....not bad!


Now, that's more like it.


You can see from the paw marks on the back door the kitties like it too.  Flora is the window scratcher...crazy girl.